

Problem
Users need to submit a new incident to the Securonix Technical Support team and follow up on existing cases.
Objective
This article explains how to create a new incident in the Technical Support portal and manage updates through email or directly in the portal.
Step-by-Step Solution
Create a New Incident
- Go to the Securonix Connect Community.
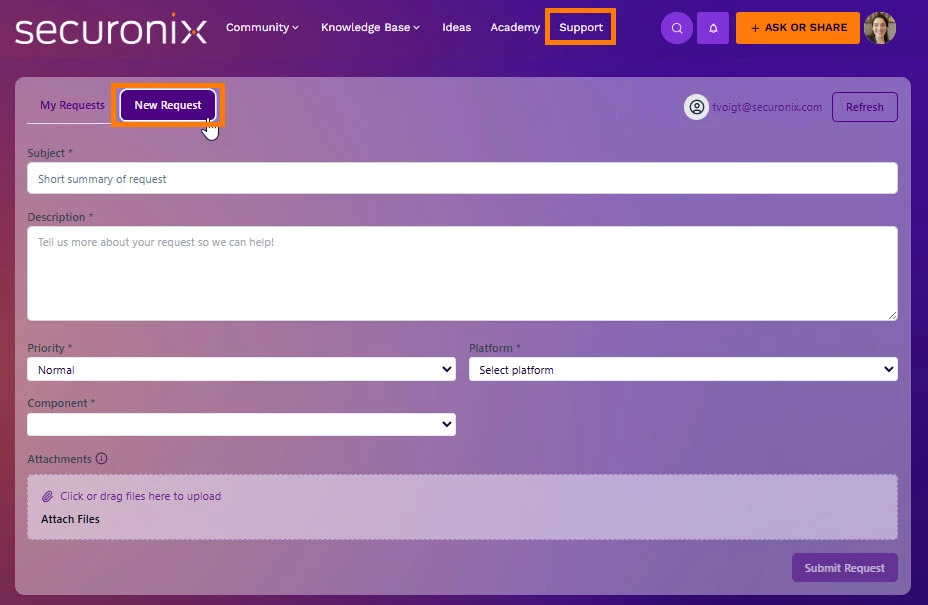
- Click on Support in the top navigation headers.
- Click on New Request on the top left of the Support view.
- Complete the New Request Form with all required details about your case.
- After filling out all fields, click Submit at the bottom of the form.
-
The system will automatically create your new case and send you a confirmation email.
Update or Follow Up on a Case
You can update your case in two ways: via email or through the Technical Support portal.
Option 1: Email Response
-
When your ticket is created, you’ll receive an email notification.
-
Simply reply to this email to update your ticket—your response will appear in the case automatically.
Option 2: Technical Support Portal
- Go to the Securonix Connect Community.
- Click on Support in the top navigation headers.
- Click on My Requests on the top left of the Support view.
- Click the incident you want to update.
- Click the Reply button at the bottom left.
-
Click Send Reply to post your message.
Verification Checklist
-
You received a confirmation email after submission.
-
Your new ticket appears in the Support tab in Community under My Requests.
-
Case comments appear under your incident history.
Call to Action
Need help or have feedback? Comment below or reach out through the Support tab of Community.