

Audience: All Community Members
Product Module: User Profile
Last Updated: July 30, 2026
KB ID: KB-20260730-update-profile-avatar
Tags: profile, avatar, profile picture, community, user profile, personalization, account settings, edit profile
Overview
Your profile avatar (profile picture) represents you across the Securonix Connect community. Keeping your avatar up to date helps other members recognize you, creates a more personalized experience, and makes community interactions more engaging.
This article explains how to update, replace, or remove your profile avatar.
Why This Matters
A personalized profile makes it easier for community members to identify one another in discussions, comments, and other interactions. Whether you’re uploading a new image or removing an outdated one, managing your avatar helps ensure your profile reflects how you want to be represented.
Note: Using a real photo is completely optional. We encourage you to choose any image that best represents you, including illustrations, abstract artwork, avatar-generated images, or your company logo. Your privacy and personal preference are always respected.
Objective
By following this guide, you will learn how to:
- Update your current profile picture.
- Replace your existing avatar with a new image.
- Remove your avatar and restore the default profile image.
Update Your Avatar
Follow these steps to upload a new profile picture or replace your existing avatar.
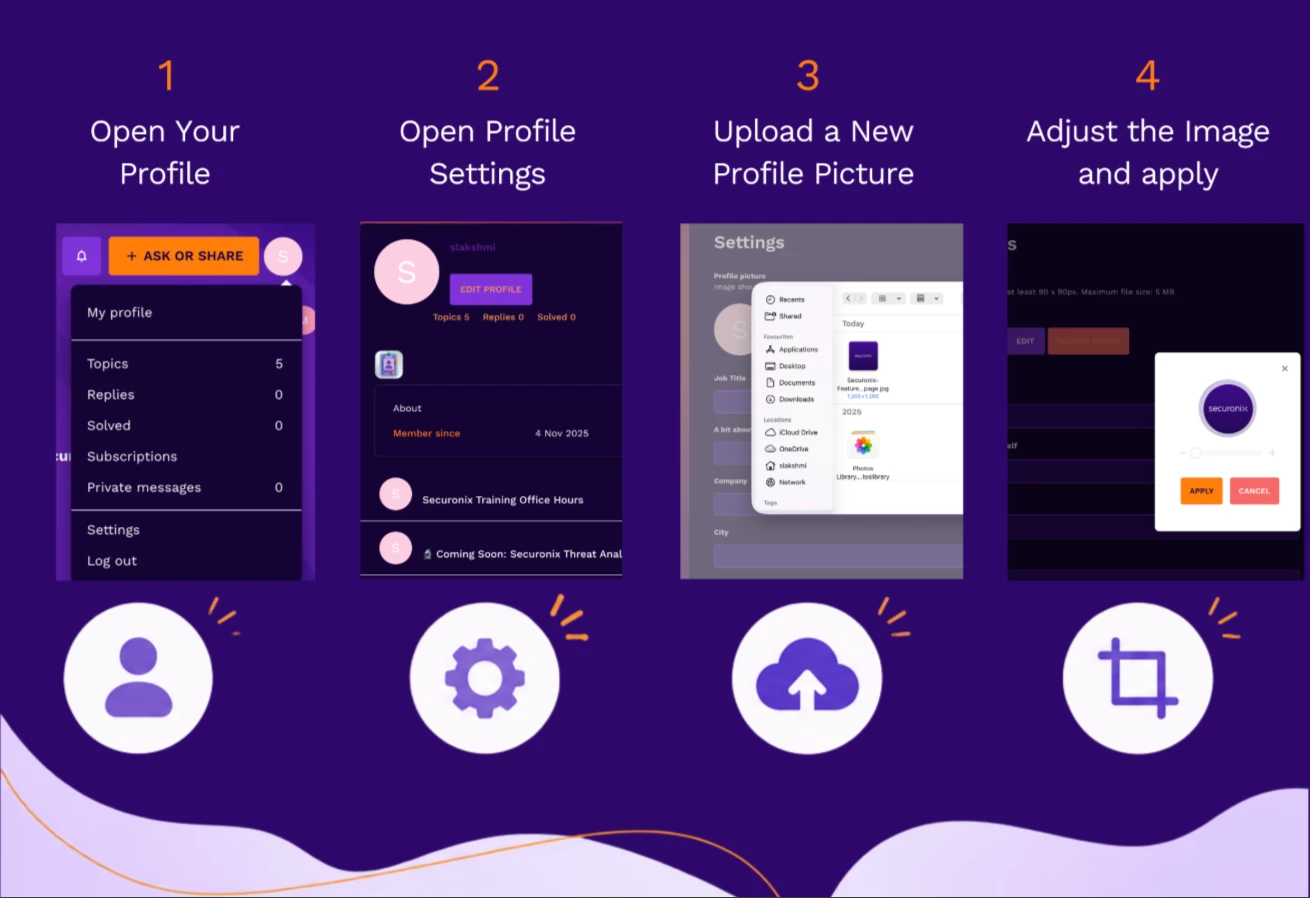
Step 1: Open Your Profile
- Sign in to Securonix Connect.
- Select your profile avatar in the upper-right corner.
- Click My Profile.
Step 2: Open Profile Settings
- On your profile page, select Edit Profile.
Step 3: Upload a New Profile Picture
- Locate the Profile Picture section.
- Select Edit (or the available option to update your profile picture).
- Browse to an image on your computer and upload it.
Tip: You are not required to use a photograph of yourself. Feel free to personalize your profile with artwork, illustrations, avatar-builder images, company logos, or any other appropriate graphic that reflects your preferences.
Step 4: Adjust the Image
If image editing options are available:
- Reposition the image.
- Crop it as needed.
- Review the preview before saving.
Step 5: Save Your Changes
- Select Apply.
Your updated profile picture will appear throughout Securonix Connect after the changes are saved.
Remove Your Avatar
If you no longer want to display a profile picture, you can remove it at any time.
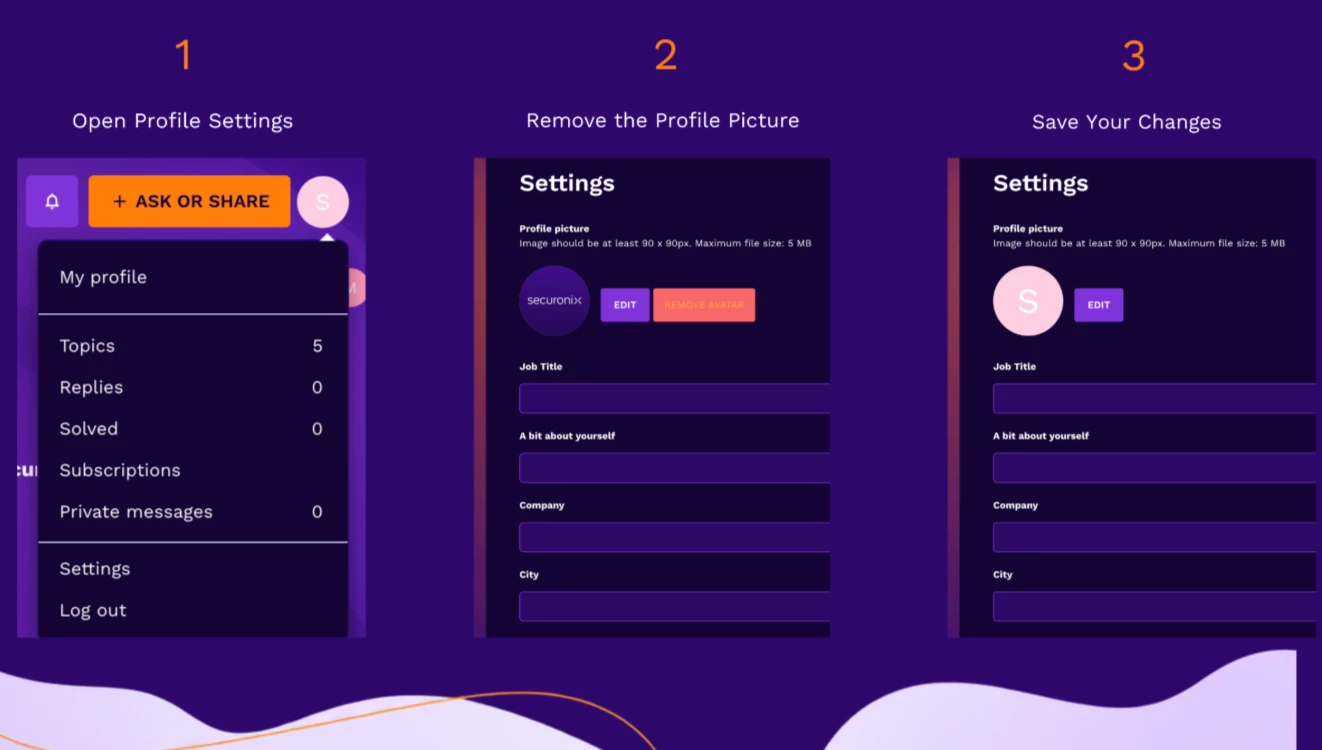
Step 1: Open Profile Settings
- Navigate to My Profile.
- Select Edit Profile.
Step 2: Remove the Profile Picture
- Locate the Profile Picture section.
- Select Remove Avatar
Your profile will revert to the default Securonix Connect avatar.
Tips
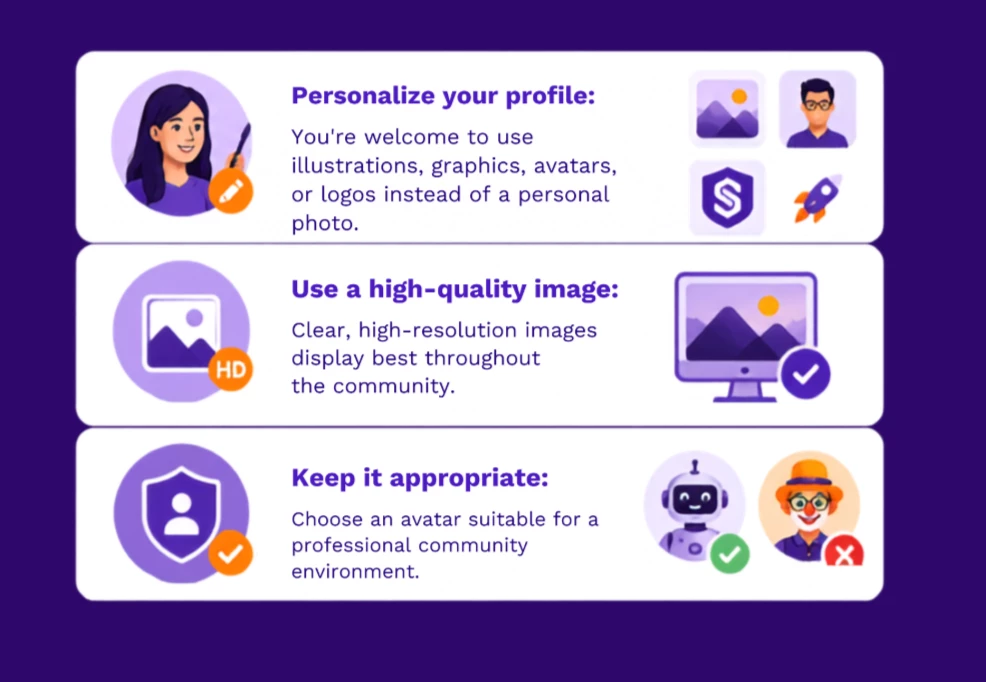
- Personalize your profile: You’re welcome to use illustrations, graphics, avatars, or logos instead of a personal photo.
- Use a high-quality image: Clear, high-resolution images display best throughout the community.
- Keep it appropriate: Choose an avatar suitable for a professional community environment.
- Don’t see your update immediately? Refresh your browser.
- Still not updated? Sign out and sign back in to refresh your profile.
Verification Checklist
Confirm the update was successful by verifying the following:
- ✓ Your new profile picture appears on your profile page.
- ✓ Your avatar displays correctly in discussions and comments.
- ✓ If removed, the default profile icon is displayed.
Summary
Updating your profile avatar is a simple way to personalize your Securonix Connect experience. Whether you choose a professional photo, a creative illustration, or your company logo, keeping your profile current helps create a more engaging and recognizable community presence.
Need additional help?
If you have questions or encounter issues updating your profile, leave a comment below or contact the Community team for assistance.